Tuesday, December 25, 2007
Sunday, December 23, 2007
Exposure Manipulation
For those blown out exposures which have already happened & you have failed to resurrect in Photoshop, it is time to move on and see what we can do to prevent these in the future. As all photographers have to admit at some point, good as Photoshop is, it is far better to get it right before we shoot, than to have to spend the extra time later. So what is it about a blown out skies that we could solve before we press the shutter release?
Clearly the settings on the camera are asking it to remain open too long, or too wide for the available light. So take the time before you click to check your settings. This is not a fail-safe, but a common sense precaution. I generally use the axom that "If I have to squint my eyes or can't see detail", I stop the lens down a step or two, or I lower the ISO. Or I check the simple knob on top & turn it to sunny as opposed perhaps to cloudy. Any of these actions will help. Other than in snow. Here your camera unless in Manual mode will stop itself down, so you usually will want to overexpose to get a properly exposed photo.
Of course with a Histogram, it becomes nearly fail-safe. I am going to assume that most of you reading this are using a body with a Histogram feature. If not then follow the suggestions above. Histograms allow us to place the LCD in Histogram View Mode so we can see immediately if we are getting the response we need. If I see on my Canon bodies any flashing white areas, I know to stop it down from let's say 4.0 to 5.6 or 8 as an F-stop. Or I might select a faster shutter speed. Whatever mode I'm in I tweak settings to achieve a non-blown out sky or detail. The alternative on many dslr bodies today is to set within the menu an exposure of 1/3 to 1/2 stops.
Now having said that one can go too far. One can get the sky just right and lose the shadows. So a bracketing approach is the answer here. If you see a severe loss of shadow detail, adjust accordingly. A move back toward a wider opening or a slower shutter speed or a rise in ISO would help. If you simply cannot get what you want then the angle which is allowing too much light in can be adjusted slightly away from the source.
Finally shooting in RAW, if your camera is equipped, is an option worth considering because if despite the precautions & changed settings, you still don't get it right, then shooting in RAW allows for professional adjustment post capture. If you'd like to read a bit further on this BetterPhoto has a great short read by Lewis Kemper of
Better Photo http://www.betterphoto.com/article.asp?id=51.html
And if you are using Photoshop CS here is another read from Dummies: http://www.dummies.com/WileyCDA/DummiesArticle/id-2382.html
Good luck.
.
Monday, December 17, 2007
Mass Daisies
From 7x10" up to 20x30" this print is available at my Gallery. Just click on Mass Daisies.
Prices for Mass Daisies begin at $12.74, subject to change.
Tags: Rich Collins, Mass Daisies, Imagekind,
Saturday, December 8, 2007
Interview On ICC Profile
Rich Collins
Printing out our own photos is something we all do. But getting results that we are happy with is another matter. While this article is not going to tell us how to do this, (I will deal with this in another Post), we should all have an understanding as to what helps us accomplish this. The famed ICC Profile, which hopeful
ly we've all heard of and most of us are at least minimally familiar with, is a key component in the mix. Here to answer a few critical questions is Ethan Hansen of Dry Creek Photo.
Dry Creek Photo provides printer profiles for the Commercial end of print processors, or Lab, that we, as photographers, use for our enlargements. They have been at this for nearly 6 years and have progressed from providing these free for photographers, which is no longer available, up to the Commercial end where they build profiles for high end commercial clients. But we can still learn a lot from this exclusive Company. Ethan Hansen has given answers to some of the most troubling questions we, as photographers, have wrestled with for a long time. If you wish to read further their site has an excellent read. A link is provided below.
Shooting Outside: Thanks Ethan for being available from your busy daily schedule. We at Shooting Outside really appreciate a professional such as yourself taking the time to help and for doing what you guys do at Dry Creek Photo. I have a few questions for you.
Shooting Outside: What is the primary function of an ICC Profile?
An ICC profile describes how the color values used by a particular device, such as a digital camera or a virtual "device" such as sRGB, map into a device-independent color space such as CIELAB. Using profiles allows different devices to communicate color accurately. The device-independent color space acts as a universal translator; with accurate profiles, the scene your digital camera records is reproduced faithfully on both your monitor and in print. Color-savvy software such as Adobe Photoshop use profiles both to match color to the greatest extent possible and to show the limitations of any step in the process.
Without profiles we go back to the days of color-by-number. A digital image is simply a file full of numbers. Without a profile, the numbers have no direct meaning in terms of color or tone. It took highly skilled digital editors and printers to know what CMYK value gave accurate skin tones on each print stock. It also took many iterations of edit, proof, adjust, reprint, etc. to get decent copy. ICC profiles both automate the process and are more accurate. In many ways the history of color profiling mirrors that of desktop publishing, just 20 years later. You no longer need to be a CMYK wizard to produce superb quality images and prints, just as traditional typesetting skills are not needed to use a word processor.
Shooting Outside: Why is it important to cyclically calibrate a monitor?
Shooting Outside: Are the ICC profiles that accompany most printers today good enough for a weekend photographer?
Ethan: They are certainly getting better. We still see a general trend, however. The first round of printers made by HP, Canon, or Epson tend to have very similar output behavior. As a given model ramps into higher volume production, we see greater printer-to-printer variability. This may correlate to additional manufacturing lines being brought online, or to other factors. It may well also explain why many early reviews of higher end photo printers tout the accuracy of the canned profiles, while later users see problems. In the end, it comes down to a matter of luck. If your printer is a close clone of the machine(s) the manufacturer characterized, the canned profiles may well suit your needs. If not, you will need a profile made for your specific printer to unlock its full potential.
Shooting Outside: How does one access a profile and what determines the correct profile?
Ethan: Profiles are not used directly. A question we commonly get is "what application do I use to open your profiles." The short answer (aside from RTFM) is you don't. Photoshop or any other good image editing or printing application uses the profile to convert the colors in the image file to the correct values for a particular output device. As to what determines the correct profile, that is harder to answer. A profile is a highly detailed snapshot of how a given device behaved at a given time in the past. If the device still behaves the same way, the profile will still be accurate. If not, a new profile is needed. Ideally, you will reprofile your own devices as needed. A lab should also provide updated profiles as their printers change.
We worked extensively with Fuji, Agfa, and Noritsu to determine optimal profiling intervals. In general, after 9 months to a year, the output color shifts will be barely visible to a trained eye under ideal lighting conditions. We recommend our lab customers reprofile their machines on a matching basis. Some choose to profile their machines every 4 to 6 months, while others are comfortable with longer timeframes.
Shooting Outside: Have you ever run across a Paper Manufacturer which changes the composition of a photo paper, without updating the profile? In other words how can one be sure they are not using an outdated profile with an updated paper?
Ethan: Epson in particular learned this the hard way. Reformulations of standard paper types 4 or 5 years ago caused headaches for many a photographer. After their travails, most other vendors are reasonably consistent with their papers. This also holds true for the ink manufactured by both Epson and Canon. Some of the smaller third party manufacturers show uncomfortably large variation between ink batches. Paper stocks tend to be more consistent. The majority of the variation we see is caused by the printers rather than the media.
If you don't have a spectrophotometer handy, the easiest way to evaluate whether your profiles are still accurate is to print a test image and compare it to one kept in dark storage from an earlier time. In many cases, a gray step wedge is the all that is needed to see gross output shifts.
Shooting Outside: Color spaces such as sRGB, Adobe RGB & ProPhoto RGB all fall within differing gamuts. When do we know to use one or the other?
Ethan: This is a function of what color space your image originated in. Most low end, consumer point-and-shoot digital cameras record color in kinda-sorta sRGB. Better quality cameras offer at least Adobe RGB range, and the raw output of almost any DSLR is closer to ProPhoto RGB. My preference is to work in the largest color space the image supports. For all the DSLRs we use, this is ProPhoto RGB. Note that it makes no sense, and in fact, degrades image quality to convert an image from a smaller color space such as sRGB to a larger one such as Adobe RGB or ProPhoto. If the output of your camera is closest to sRGB, use it. An alternative is to profile the camera. This is not for the faint hearted, requires reasonably good studio lighting equipment, and is only supported by a few raw file processing applications. For those of use who use camera profiles, however, the benefits are well worth the cost.
Shooting Outside: Color profiles one pays for are good for how long? Your Company Dry Creek Photo provides free profiles. Which ones are better and why?
Ethan: A profile is good until the output of the device the profile is made for changes. Many of the lab profiles on our site get updated because of a machine configuration change or major repair. While the profile on our site are free to download and use, they are paid for by the labs themselves. In my undoubtedly biased opinion, our profiles are second to none in quality. We developed our initial profiling targets and software based on evaluations of -- at the time -- well over a thousand printers. We continually fine-tune the process, and have experience building tens of thousands of profiles. Along with the profiles available on our site, we have made many thousands of profiles for individual photographers, photo labs, printer manufacturers, paper and ink vendors, museums, and oddball industrial applications including t-shirt and CD printers, coffee cups, and aircraft manufacturers (just in case you wondered how the colors on both the inside and outside of various planes were controlled).
Shooting Outside: At some point Dry Creek decided to offer profiles without charge. Can you tell us why?Ethan: We did indeed start by offering free, basic profiles for digital labs in early 2002. At the time, the only printer profiles most photographers had contact with were the lousy ones Epson bundled with printers such as the 1280 and 2000P. The typical experience was to try a profile, see the results sucked, and join the chorus chanting "profiles do not work." Color profiling had been around in one form or another since the late 80's, but did not have an open standard until the mid 90's with Apple's ColorSync. As we made the transition into the digital world, we found ICC profiles invaluable. We built profiles in-house for our own use for some years, but as with many great ideas, the genesis of our color profiling venture arose over late night conversation and beer.The introduction of the Fuji Frontier printer brought high quality digital printing to everyday photo labs. Noritsu, Kodak, and Agfa all followed suit. Our first idea was that it would be wonderful to be able to shoot on a remote location and be able to get reasonably accurate, inexpensive proofs made at a nearby lab. We sent test images to various friends and acquaintances to build a small database of profiles for our own use. The quality of the results were noticed both by said friends and the labs themselves. We then decided to open our offer to the photographic public through several online forums. Our goal was to enable the photographic community at large to experience what color management could provide. At the risk of tooting our own horn, I submit that we succeeded in this task.
We quickly amassed several hundred profiles from labs around the world, and had many more requests pouring in. The onslaught was more than a small company could handle on a no-charge basis, so we called a halt to our experiment. The freebie profiles we built were made from a greatly reduced target -- large enough to be more accurate than a printer's automatic routines could do but far less than what we could achieve with a dedicated effort. We switched to a fee-based profiling service, offering profiles to both labs and individual photographers. While many labs wanted their profiles to be posted on our site, many others decided to either use the profiles internally or to only offer them to select customers. We reluctantly dropped our profiling service for most individual photographers and photo studios, as the tech support demands made the effective hourly wage less than small. Working with most photographers was a joy; the occasional ones who regarded us as a 24-hour hotline for Photoshop, camera, printer, and life support proved unworkable.
We are now working with both selected photo labs and printer companies. By early December, we will re-open our profiling service for both photo labs and printer and media vendors. We continue to work with a number of photographers and photo labs, but not on a general basis.
Thank you Ethan.
Hopefully we all have a better understanding of why ICC Profiles are so important to our getting as close to perfect as we can with our prints both at home and at the lab. Thanks to Ethan Hansen and Dry Creek Photo for their generous time in helping to explain some very important tips. A reminder; Ethan and Dry Creek Photo is not available for questions, but feel free to Comment here with any questions and I'll do my best to point you in the right direction.
Thursday, December 6, 2007
A Holiday Gift for Christmas, Kwanzaa or Hannuka
This week's featured art is YellowTulips by Rich Collins
As a Christmas gift this year, consider this Spring flush of color Tulips. It will bring cheer to your loved one's favorite room. Give a gift that lasts throughout the year and I'll include a Signed Greeting Card to match. The first 10 to order will receive this added Bonus.
Prices for YellowTulips begin at $12.74, subject to change.
Tags: Rich Collins, YellowTulips, Imagekind,
Friday, November 30, 2007
What do you think?
Or if it was just what you wished for or even better you learned something, give us a major kudo: Donate to keep this blog healthy. Or at least a Hat's Off to yah!!!!
Don't be shy, let us have it. We can take it.
Once in awhile a Really Fun Site Grabs Your Attention
Come on take a chance. But do us a favor here too and let us know what you think. Without feedback we can't know if we are giving you what you want.
My Gallery at BetterPhoto
Just so you know what Better Photo offers take a look at my Free Gallery there. Their details on their Free Better Pholio are as follows:
under the heading Website/Miscellaneous > How can I get a free Better Pholio?
You'll find member threads on images which make the grade as far as BP staff designates. And as well others may comment on any other members galleries or individual photos. Mostly members are very kind & supportive and once in awhile a Staff Member steps in to add their comments for a learning experience. Contests on-site are always available according to differing criteria or by subjects. And as Jim Miotke likes to mention, If you have a question about your digital camera, exposure, composition, lighting, or Photoshop, feel free to ask Jim during the BetterPhoto Radio show, airing 1-2pm Pacific time each Friday afternoon. Call 1-877-474-3302.
Think about this as a personal guide to better photography, complimentary.
Sunday, November 25, 2007
Imagekind & Free Shipping Mon/Tue Only
Let me alert you to Imagekind's Free Shipping tomorrow & Tuesday only. Check it out at IK and save if you had planned on buying some Fine Art Photography anyway. This is another great deal at Imagekind & trust when I tell you that my clients have given IK nothing but the highest compliments when it comes to Communication, the actual Print Quality & the Shipping packaging. They do a really professional job at all three. They are second to none. You have 2 days, so don't miss this.
Is this a plug for myself also? Hmmm, maybe.
Virtual Photographer Software Download
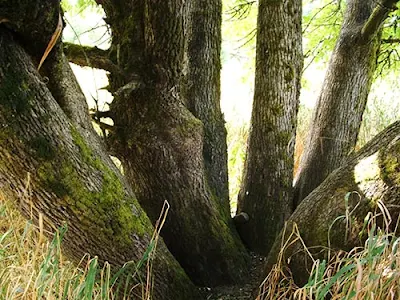
This is the first time I've used this so the effects are not fully realized. The effect I chose are harsh & sharp by utilizing 'Clear' as the effect, then did a Layer Adjustment and filled with a dark gray to overcompensate for a overexposed background and some too bright highlites in the grasses. Within this plug-in are 24 Color effects and 30 B&W effects with sliders for strengths. For the soft effect without using any layer adjustments see this one. Even the Soft one has more Pop than the original. Focus on the grain of the bark and the individual grass blades.It is a fun program to use, but it can also produce some really Professional work if the time is taken to massage the tools within. Take a look, try it out as the Download is Free. Here is a brief description of their tool Enjoy & get back to us with an example from your photo sharing site with a link, or a Up or Down ranking.
Saturday, November 24, 2007
create your own christmas card with POP
Christmas Cards are always fun to send but making them special can sometimes be a real challenge. Here's a very simple technique to use. Out my back deck is a neighbor who already has all the lights up. You can enhance the look merely by rolling the telephoto while holding down the shutter button. The darkness will force the lens to stay open longer & the finished product will display a much more spectacular Christmas lights look. Add some text & voila.
Share yours by adding a link to your favorite photo site. Merry Christmas.
Wednesday, November 21, 2007
Digital Art
Wormhole Storm -09162007 by Randall Klopping
Gorgeous piece of digital work. And amazingly affordable.
Prices for Wormhole Storm -09162007 begin at $9.34, subject to change.
Sunday, November 11, 2007
What Are ICC Profiles?
___________________________________________________________________________
Every printer manufacturer out of necessity includes a color print profile to enable their printer to print a reasonably good photograph. Some are much, much better, than others. Still no matter how good a manufacturer's profile, it will never compare to custom ICC profiles. ICC Profiles are simply put, color space tables for a printer to interpret for printing. They must always include the Manufacturer's printer model or series and the paper type one might choose, such as Glossy or Matte. And for those of you who print directly from your printer you should have few problems using these standard included profiles. Just choose the paper type & print using the software included by selecting criteria for size, color, black & white etc.
But for those with the taste for accuracy, rather than choosing the generic profiles that are out there, you'll need to look up the ICC Profiles for the paper types you like to print on. You won't find ALL photo paper suppliers offering this. But for the better photo papers you can locate them. For example at Ilford you can quickly register to receive any ICC Profile free of charge. Clearly papers such as these or Museo brand can aid in your quest for perfection. You must remember that if you are willing to take the extra effort to get better prints, you will need to take the extra steps to accomplish this. You will have to calibrate your monitor. Buying software to do this is only the first challenge. It is not difficult, but it is not for those who simply want to share or print quick photos for the family. I am not talking snapshots here.
To read more about what it takes, rather than just jumping headlong into this whole idea of what ICC Profiles are, and believe me it can become very quickly confusing, you might want to start with a most basic understanding of what this could entail, read this brief tutorial at Luminous Landscape.
Remember this in where those of you who want the very best prints will eventually end up, but before you do, start out slow and read up on this first.
NOW, after reading, start thinking about those great pictures you are going to be taking on Thanksgiving and upload to your favorite photo sharing site, to share here in my T-Day Post coming soon to a blog near you. Well here actually.
Tuesday, November 6, 2007
Thanksgiving Photos are Coming From You
Share them with us all here at Shooting Outside. While we'd prefer outdoor photos from your Thanksgiving Day feast, Party, Suaree', Festivities, Get-Together or Solitare Celebration, you can share them with us if you Comment & leave us a link to your photos. Food shots usually don't shine well, but if you think you've one well exposed, T-Bird or No, add a link to your photo sharing site & we can all take a look
Here's one to get started of My Son, my Mother & my Self from last year. As you can see, no one was left hungry.
Sunday, November 4, 2007
Pleasing Skin Tones
I checked a photo I had taken yesterday at a Portrait shoot with a client who had done her makeup to perfection for a Real Estate business card and asked me to lighten the blush on her cheek. I did only that. It looked fine. Then I followed the tutorial every step exactly as explained and what occurred was a general toning down, a good thing, but also a cast which the client was not happy with. Fortunately I printed out both as proofs. She chose mine with, under CMYK restraints, at 24-Yellow, 25-Magenta & 8-Cyan. The tutorial's instructions were to adjust to 30-Yellow, 24-Magenta & 8-Cyan.
So even though these values are very close my advice is to always check with your own eyes. Don't blindly go in lock-step with any tutorial as lighting conditions, camera settings and client expectations offer too many exceptions to this rule. All in all though a great tutorial for learning the HOW of settings.
Take a run at this then let us know how it worked for you. If it turns out good and you don't yet have an online Gallery try Kodak
BTW, if your monitor is calibrated & you are using an ICC Profile for the paper type you will get accurate results, otherwise what you see on your LCD may not even be accurate.
Saturday, October 27, 2007
Making Rocks
Good luck and let us know what you think. I am always most appreciative of any tips concerning chinks in the armor of tutorials.
Friday, October 26, 2007
Lunacore Photoshop Training Water Drops
Ever had a photo you wanted to add a little pizzaz to? I have one of rain on leaves I really am fond of. I have printed it and have it hanging so people who visit can see it. However one day a client was visiting and asked if I had one just like it but with flowers in it. I said I'd have to check and I'd get back with her. After searching all of Bridge I had to admit I had a few but wasn't able to find what she wanted. Then I came across one which had everything she wanted but the water drops. I did a search in my OutsideShooter's Photoshop Tutorial Search engine on this page below About Me, and came up with this. The photo above is from the tutorial.
It's relatively simple and adds a subtle splash to your image. Give it a try, then bring back your Comment.
Thursday, October 25, 2007
Why use a layer when making photo adjustments?
Since many use the standard JPG format, a lossy configuration, they find that each time their image is altered, data is lost, meaning that accurate sensor information is gone forever. If your image file is nothing special then you have nothing to worry about. However if you are shooting to sell any of your images, or are particularly fond of your photo then following this brief tutorial will give you an advantage.
Open your JPG image in Photoshop. If you choose Image> Adjustments> then choose an option you'll be changing pixels within the original file. Not a good thing if you make a mistake and then save in original JPG format, because you have now forever altered the photo and lost data. You can of course avoid pixel damage by using a different approach, choosing the use of Layers and saving appropriately.
You can alter your image safely by using Layer> New Adjustment Layer> and perhaps Levels or Curves, for instance. The effect is easy to check by simply clicking on the eye icon next to the background layer. You will see that the effect you have created will show on the background layer.
You now have the choice to Save As (Control/Alt on a PC) create a name and save. Then when closing you will be asked if you want to Save changes to the original Photoshop document before closing, and here you can simply click on 'No'. Choosing the 'no' option allows for the original image to hold all of the original data for future use.
Saturday, October 20, 2007
5 Simple Tips for Decorating with Art
Choosing art can be a difficult process. Not only are there millions of pieces out there for you to sift through, look at, dismiss and decide upon, you must also have a good understanding of what it is you are trying to accomplish when decorating with art. Below are five simple tips that can make selecting artwork easier and ultimately more enjoyable.
- Connect with it: Art is many things to many people, but when choosing how to decorate with it, it needs to be yours and yours alone. Whether the piece inspires you, calms you, excites you or just generally makes you happy, that is where you need to start.
- Blend it: Not only should the artwork affect you internally and emotionally, it must help create a space that surrounds you externally. Whether it is furnishings, accessories or the people who occupy the space, the art you choose should be a reflection of that and be able to pull it all together.
- Hang it: What good is wall art if is not on the wall? Here are a few tips for hanging your artwork:
- Bigger is often better by creating more of a statement. Go with small prints on narrow walls and large works for large surface areas.
- When hanging wall art over furniture, it should generally not be longer than the piece of furniture.
- Hang art so that the center point of the piece is at eye level for the average person.
- Mat it: A white or subtle cream mat brings the focus to the artwork itself. To create maximum impact with your prints, consider choosing a mat that contrasts your wall color: light mat with a dark wall and dark mat for wall painted with a light color.
- Frame it: Usually, when selecting a frame, you want to avoid choosing a color that is too similar to the color of the mat you chose. Blending and selecting mat and frame colors that are evident within the painting itself can provide a cohesive and complete look.
Try these at will from popphoto.com
From Sunny 16 to Moony 11, 8, and 5.6, these facts, formulas, and photographic rules can get you out of a jam and help you get good shots when nothing else will.
By Jason Schneider
September 2007
What happens when your systems go belly-up, when all of that cutting-edge technology dies and you must rely on (gasp!) your own knowledge? It pays to have these basics in your head. They can get you out of a jam and help you get good shots when nothing else will.
1. Sunny 16 Rule
The basic exposure for an average scene taken on a bright, sunny day is f/16 at a shutter speed equivalent to one over the ISO setting—that is, f/16 at 1/100 sec at ISO 100. From this you can interpolate, and try f/22 at the beach, f/11 on a cloudy-bright day, etc.
2. Moony 11, 8, and 5.6 Rules
There are many different rules that work well when shooting the moon. One favorite for a proper exposure of a full moon is f/11 at one over the ISO setting. For pictures of a half moon, use the same shutter speed at f/8, and for a quarter moon, use the same shutter speed at f/5.6.
Related Links
• Adobe Photoshop Shortcuts
• Digital Toolbox Archive
• Subscribe to the PopPhoto newsletter and get a new tip by email each week.
3. Camera Shake Rule
The slowest shutter speed at which you can safely handhold a camera is one over the focal length of the lens in use. As shutter speeds get slower, camera shake is likely to result in an increasing loss of sharpness. So, if you're using a 50mm lens, shoot at 1/60 sec or faster. Not enough light? Use a flash, tripod, or brace your camera against a solid object.
4. Anatomical Gray Card
Metering off an 18-percent neutral gray card is a good way to get a midtone reading that will give you a good overall exposure of a scene. Forgot your gray card? Hold your open hand up so it's facing the light, take a reading off your palm, open up one stop, and shoot. (Various skin tones rarely account for even a full-stop difference.)
5. Depth of Field Rules
When focusing on a deep subject, focus on a point about a third of the way into the picture to maximize depth of field, because the depth-of-field zone behind that point is about twice as deep as the depth-of-field zone in front of it. This works for all apertures and focal lengths, but the smaller the aperture and the shorter the focal length, and the greater the distance you shoot at, the greater the depth of field.
6. Largest Digital Print Rule
To calculate in inches the largest photo-quality print you can make with a digital camera, divide the vertical and horizontal pixel counts (see your manual) by 200. For critical applications, or if you want exhibition-quality prints, divide the pixel counts by 250
7. Exposure Rules
The classic advice is, "Expose for the highlights, and let the shadows take care of themselves." This works with slide film and digital. But with negative film, especially color negative, you're better off overexposing by one stop.
8. Quick Flash-fill Rule
When using an automatic flash unit that doesn't provide auto flash-fill ratios, set the flash's ISO dial to twice the ISO you're using. Meter the scene, select an f-stop, set the autoflash aperture to the same f-stop, and shoot. The resulting 2:1 flash-fill ratio will produce filled shadows one stop darker than the main subject.
9. Flash Range Rule
Want to know how much extra flash range you get by going to a faster ISO? The rule is, "Double the distance, four times the speed." For example: If your flash is good to 20 feet at ISO 100 (film or digital), it will be good to 40 feet at ISO 400.
10. Megapixel Multiplier Rule
To double the resolution in a digital camera, you must increase the number of megapixels by a factor of four—not two. Why? The number of pixels in both the vertical and horizontal dimensions must be doubled to double the pixel density across the image sensor.
11. Action-stopping Rules
To stop action moving across the frame that's perpendicular to the lens axis, you need shutter speeds two stops faster than action moving toward or away from you. For action moving at a 45-degree angle to the lens axis, you can use a shutter speed one stop slower. For example: If a person running toward you at moderate speed can be stopped at 1/125 sec, you'll need a shutter speed of 1/500 sec to stop the subject moving across the frame, and a shutter speed of 1/250 sec to stop him if moving obliquely with respect to the camera.
12. Sunset Rule
To get a properly exposed sunset, meter the area directly above the sun (without including the sun). If you want the scene to look like it's a half-hour later, stop down by one f-stop, or set exposure compensation to minus one.
Tuesday, October 16, 2007
Saturday, October 13, 2007
A Photoshop Tutorial Web Site You Will Love
http://www.radiantvista.com/
The one I just finished watching was on retouching portraits for those of you who want a change from outside shooting. Here's the link:
http://www.radiantvista.com/tutorials/a-photoshop-reference-portrait-retouching
The movie by Mark Johnson was informative and fairly easy to follow, though I'll warn you you may want to listen for a step or two, then pause & do the steps yourself before restarting the video. This would be one of those occasions where having a second monitor really helps. Watch the tute on one, work on the other but for most of us we'll get through on our single flat panel LCD.
It begins by explaining the Liquify Filter & how you can adjust facial elements, the eyes, the nose and the mouth. It's a fun tool but its also an efficient tool. It even addresses adding catch lights to the eyes for depth and shape, through the use of layers. Gets a bit technical on the section dealing with Portrait Color Correction but its worth a lot if your workflow involves any of this.
The Radiant Vista is a very well put together site I urge you to visit. In fact at the present time they are offering the chance to Win A Week Long Workshop. But there is a small catch, you need to purchase a a tutorial collection or an extended download period. Details are there.
Try it out and let us know what you think.
Friday, October 12, 2007
A Photo Blog that will become an Absolute Must
Tim also answers questions for you for a fee at his regular site http://www.timgrey.com/ddq/, where you can register to receive answers from other's questions without having to pay the fee. You just won't be able to ask questions yourself.
Tim also writes books and does appearances. A wealth of information and guidance can be had through his resources. He is an employee of Microsoft but has an in-exhaustable energy.
http://timgrey.com/blog/
Thursday, September 27, 2007
Give your Top Photoshop Tips or Tricks Site
Monday, September 24, 2007
Thursday, September 20, 2007
Where do you go for photo help?
Where do you go for help in resurrecting your photos? There are many tutorials available online & in books. But I want to know where you call Home when it comes to getting help. Maybe you read about sharpening or masks, maybe you look up Photoshop tutorials. Whatever & wherever you go, post them here so we can all gain from you feedback.
Thursday, September 6, 2007
Outside Shooter First Post
Can you remember the first time you picked up a camera and started shooting?
My first memorable one was of a wagon wheel, or an angle of a wagon wheel when I was a youngster. I recall most everyone who saw it just stared for a time before saying, (everyone said this) "What is it?"
But an Uncle of mine looked and right away recognized it. He later went on to become the family photographer. I always enjoyed it when he looked at my photography. He could see what I could see. I am now the family photographer, and I do produce and sell photos at my website where I have the Galleries at Pixels
Can you recall your first impressive photo? Here's your chance to explain all it involved and how you impressed others, or not such as I. Think back. I know you can recall one.
What is it about adding Wall Art that Makes Your Place so Special
Cl early it's not just adding any old piece of art What happened to you the first time you entered a home or a business when you knew t...
-
Subscribe to ShootingOutside by Email Free Photo Questions Answered Today If you have a photography question, you c...
-
All of us have interior design style requirements for our homes and offices. They can include the following; contemporary minimalist or ma...
-
If you really want to know more about my work, here's your chance And if there are any questions you can contact me directly at my web...
-
Two Very Special Prints at my website These prints are within my Gallery called Building and Architecture and are titled 'Icy Fort...
-
Do these reason affect your buying art? If not let us know because we there may be other reasons too, so leave a comment below if you agr...
-
Getting the Details in the Shot If you're new here, click to subscribe to the latest post. A shoot entails capturing images t...
-
Rather than Spending $$$$ on Dinner for Your Favorite Veteran, Gift them a Special Print that will last for Decades Your Special Veteran, de...
-
2021 in Review and 2022 Looking Ahead Here it is again, another year almost in the Rear View Mirror. As the year progressed I was delight...
-
The place to shop for Christmas lists: Pixels.com Features of Pixels.com Diverse Themes: You can find everything from neon cityscapes and ...